

Lacework Crochet Belt
- darlingdanadesigns
- Apr 26, 2020
- 2 min read

Updated: Mar 3, 2021


Have you ever purchased something online and it looks so good on the model and you get it and you're like, this cannot be the same item! Preach, girlfriend! I bought this denim dress and was so excited when it came in the mail only to be sorely disappointed that it was SO LONG on me. (If I haven't mentioned- I'm vertically challenged)
I didn't want to return it but my sewing skills are a little sketch. I mean- I can do the basics but altering the length of the dress with a clean seam... I didn't think it was possible. Then *LIGHTBULB* moment! I could crochet a cute belt to go over my potentially awkward seam and it would make the dress EVEN BETTER. Crochet makes everything better! Am I right?

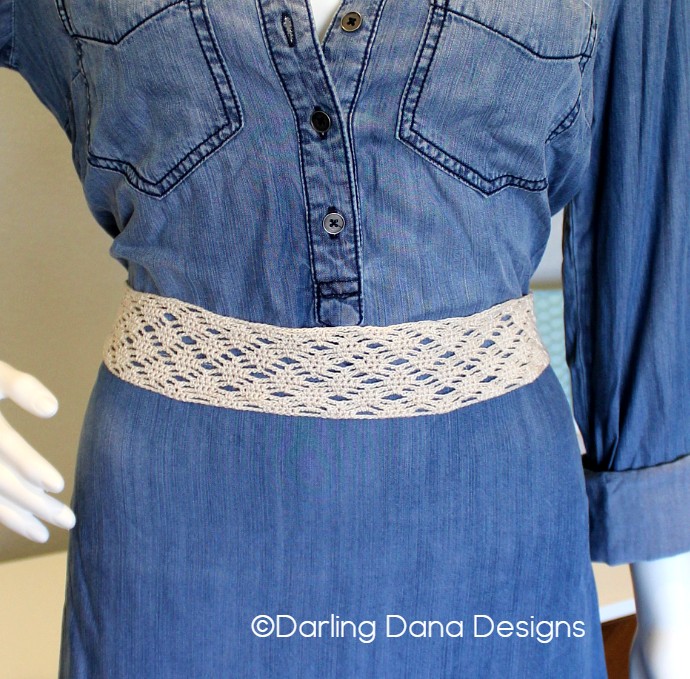
I'm loving how it turned out and I can't wait to wear it! I crocheted the belt true to size and sewed it onto my dress but you can make it a little longer so you can tie it if you'd prefer and swap it between outfits.
I used the stitch found in the "Crochet Stitch Visual Encyclopedia". If you don't already has this book, I highly recommend it. It's full of great crochet stitches and fun motifs for all kinds of projects.
Happy Crocheting!
~Dana
Here's how I made it:
Materials:
Aunt Lydia's Crochet Thread --> Get yours here!
Size 1.5 mm hook
Thread Needle
Measuring tape
The stitch was pulled from "Crochet Stitches Visual Encyclopedia"- Zen Lattice --> Purchase your copy here!
**You'll measure a little different depending on what you are making the belt for. Is it similar to my project where you'd like to add it to a shirt or a dress? Or are you looking for an add on accessory?
Add to an existing article of clothing:
If you are making it to fit an existing piece of clothing like I did- measure the article of clothing you'd like it to fit. Laying it flat, measure from one seam to the other on both sides where you'd like the belt to be. You'll then chain in multiples of 8 until you've reached the desired length adding 2 additional chains for the first row. Follow the remaining pattern in the book on page 53.
Separate add on accessory:
If you are looking to create an an add on belt where you tie it in the back- measure around your middle, just above your hips. You'll want to add on length to account for tying it in the back. I recommend 12-14 inches depending on how much you prefer to hang down after tying and if you are planning to tie it in a bow. (If you have an existing belt you could measure that for length as well).
You'll then chain in multiples of 8 until you've reached the desired length adding 2 additional chains for the first row. Follow the remaining pattern in the book on page 53.


Comments